Tables
There are a
multitude of table solutions on Drascombes to supplement the centreplate
capping which is usually the only level surface available. There is a simple
and popular solution for Coasters which comprises two pieces of plywood and a
leg. One piece of ply has an arch cut in the bottom edge so that it will bridge
the rudder casing and fit into the gaps at the front of each of the Lazarette
lids. The top edge of this rear support is hinged near to the rear of a
rectangular piece of ply which forms the table top. A
leg (sometimes a piece of broom handle) stands on the cockpit floor, fixes to
and forms the support for the front of the table. If anyone can send me a
suitable picture of one of these I can put it here.
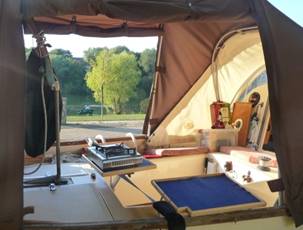
Here are Appuskidu’s tables – shown above rigged for breakfast
ashore on a French campsite by the
The Tray/Table
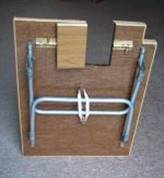

This is Appuskidu’s first table. I found by accident that
Grandmother’s old “breakfast in bed” tray with short folding legs not only fitted
on the rails intended for the “standard option” gimballed Gaz
burner and tray, but if I stood it on the cockpit seat and hooked one edge over
the gunwale, it made a relatively level surface.
The original
top has now been replaced with marine ply surfaced with left over teak style
laminate. The hinged cut out is to clear the bilge pump pipe-work when it is
stored in its rails under the bridge deck. Except when it is on the cockpit
floor, the cooker is stood on this tray and there is room for mugs, cutlery, marmalade etc as well.
If you are
looking for a ready made alternative I saw the following
nice wooden one in a Habitat store in
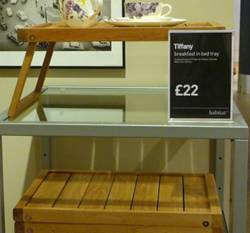
In use, non slip matting is used on the top at all times as on the
pivoting table below. When it was sat on the aft deck in front of the raised
tiller, non slip matting is also placed underneath. It
is seldom used in this position any more though because a second table has now
been made which mounts on alloy tubing which fits into teak sockets on the back
face of the cockpit See “Pivoting table” below. With the cooker on the pivoting
table, the tray/table is now always used on the cockpit seat with one edge on
the gunwale to keep it level.
Pivoting
Table
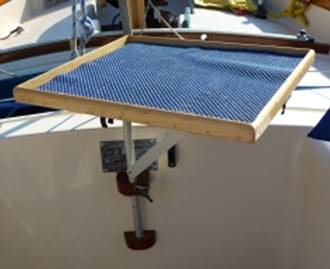
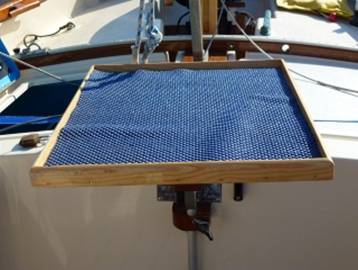
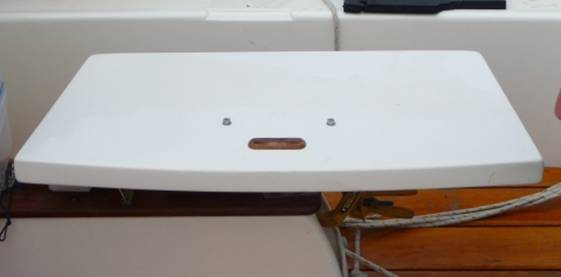
This is Appuskidu’s new additional table. It is even more useful
than the first table. The inspiration came from a commercial product fitted to
the Coaster “Bishop’s Move” owned for many years by Chris Bishop. Lighter and
obviously cheaper than the commercial product, this table mounts at the back of
the cockpit and has four great attributes. The first is that it mounts high
enough for two people to sit on the side benches with their knees under it so
they can “sit up at the table” to eat comfortably. Secondly, it makes a secure
place for the cooker well away from the fabric when the cockpit tent is up.
Thirdly, it swivels to improve access to the lazarette or to the pontoon when
alongside. Finally it easily de-mounts and breaks down for flat storage.
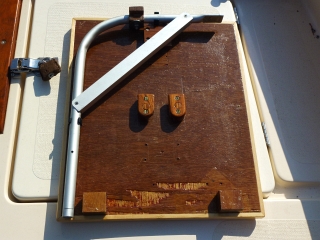
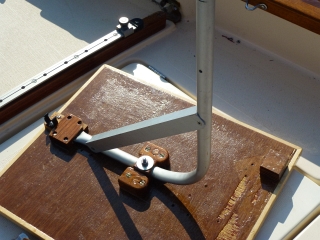
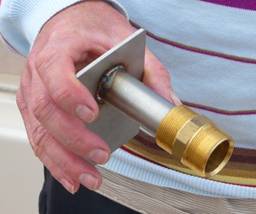
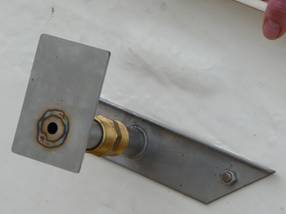
The Frame is
made from an offcut of 19mm aluminium tubing left
over from the cockpit tent poles. This is bent to ninety degrees so as to give
a horizontal table. The bend is stiffened with a piece of aluminium angle left
over from the false ceiling in the kitchen at home. The front end of the tubing
is flattened in the vice to make a tongue that engages in a matching slot in a wooden
block under the front of the table. A ‘T’ shaped block is bolted to the tubing
using a penny washer to spread the twisting stress. The ears of this block
slide under and between two ‘L’ shaped blocks that are screwed to the centre of
the underside of the table such that the horizontal ears of the ‘T’ fit under
the horizontal elements of the ‘L’s. The ‘L’ blocks are given a slight
longitudinal taper so that the frame fits tightly to the table and stays put in
use. There are two extra blocks under the back edge of the table. These are
left over from a previous experiment but remain as they help the table to sit
level in storage and have no other function. When the table is packed away, the
frame lives clipped under the table in a couple of pipe clips.
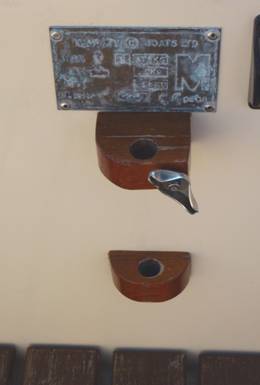
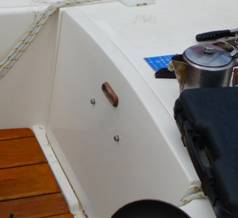
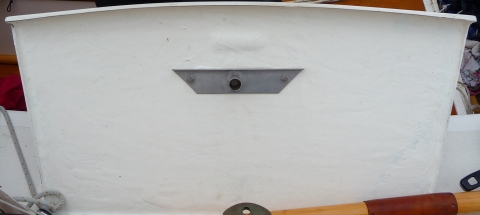
The mountings on
the boat are a couple of teak blocks on the back of the cockpit which are
screwed through backing pieces on the inside of the lazarette. The backing
pieces spread the load over a wide area as the load
could be great if someone falls across the table. The bottom block has a blind
hole to stop the frame dropping through but has a small drainage hole. If you
have cockpit flooring the lower block must not be set so low as to prevent the
flooring from being lifted out. The top block has a very fine vertical saw cut
at the side and a bolt with wing nut. This allows the table to be clamped to
prevent unintended swivelling – although this has not proved necessary in
practice due to a close tolerance between main hole and the frame tube
diameter. The top block is actually in two parts in order to space its hole out
far enough so that it is vertically above the hole in the bottom block. The
faces of the blocks that mate against the cockpit wall also have to be planed
to an angle such that the holes end up in line. This is marked by first
levelling the boat using the trailer jockey wheel and a spirit level on the
centreplate capping. Then offer up the blocks with the frame in the holes of
the blocks whilst using the spirit level to keep the frame upright vertical. With
your assistant’s third hand use a straight edge to mark a line on the blocks
parallel to the back of the cockpit.
Chart Table
Appuskidu
doesn’t have a chart table. Navigation is done on a chart board that fits
across the companionway when at sea – see separate project. However, if you
would like a folding chart table in the cabin here is a neat combo solution on
David Camlin’s ‘Delta’ whose home port is in
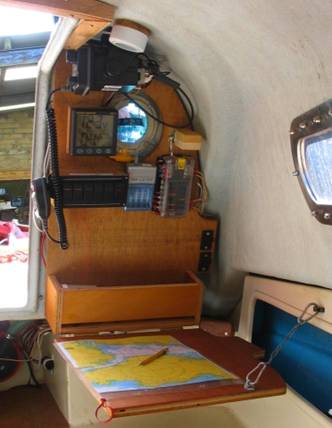
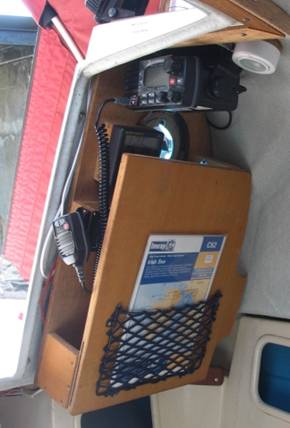
Ingenious Longboat
Table
This is
another idea from
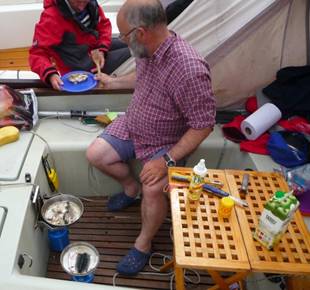
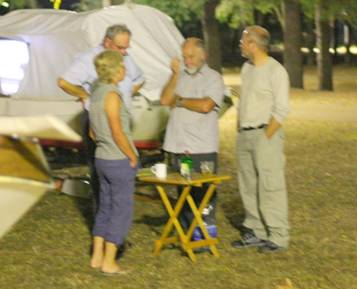
Then there is
the stand alone solution. Illustrated
here at left with Jack O’keefe serving a fresh caught
mackerel lunch. This style of course has the additional advantage that
it can be used ashore.